Hey Everyone here I am gonna discuss about how to make a guitar banner with Adobe Photoshop & which tools I am going to use to make this design. I am planning to start a guitar training course where I will teach guitar lessons, for that I have promote my Guitar Training Courses to reach my targeted audience. I am going to use digital marketing as you know nowadays digital marketing is very affective to promote any business & I also print some banners, pamphlets or brochures but first I need an eye catching design & that design I will make by myself using Adobe Photoshop. I am sharing step by step guide to make this design and every one can make this design using my step by step guide and can earn by selling this design as well. So let's start now.
Must to have Adobe Photoshop to make Designs
you must to have Adobe Photoshop to make any kind of Design. If you don't have you can download through
Google easily and there is a website named
getintopc.com. after download Adobe Photoshop simply install this software into your system & run it. After completing all this step you are ready to go.
Step 1: Insert a new page
To draw something or to start designing first you have to insert a page where you can put you layers for create a design. First of all go to the right top corner from your Adobe Photoshop window you can see File section by clicking on it you can see there appears a New option first of the row. Click onto New you get a page (or you can get a page by pressing CTR + N from your keyboard) where it will open a dialogue box full of editable dimensions of Pixels, Width, Height, Resolution etc. By adding specification you can create a new page. After that start your design.
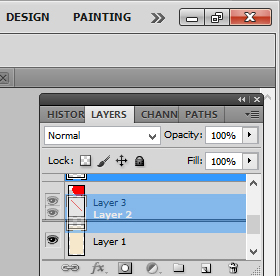
Step 2: Create Layer
So a Design makes with some layers, without layers no design you can create. Here I created first layer by copying Background layer from Layer Box by simply dragging the background into Create a new layer left side of Layer Delete or by pressing CTR + J from keyboard also you can Create a new layer by just clicking on Create a new layer. You can see layer box in left side in your Adobe Photoshop. If Layer box doesn't appeared there you can get by clicking on Window section from the top bar and get Layers option from this window or you can get the Layer Box by pressing F7 from your keyboard.
Step 3: Resize & fill Color into Layer
Here I am making layer size shorter than the background layer by pressing CTR + T from keyboard, after that you can see a compressible box have appeared beside of the layer. just move this box inside from every side by pressing left key from your mouse. After of compressing select Paint Bucket Tool from the Tool bar or press G from your keyboard to select this tool. After that click onto Set foreground color and choose color which you want I chooses color code #f6e8cb and then select the layer by pressing CTR from your keyboard click left key from your mouse onto the layer image from the Layer Box. After that move your curser in the middle of selected layer and fill color into the layer by pressing left key from your mouse. After that select Crop tool from the tool bar or press C from you keyboard and press left key from your mouse in the middle of the layer page to deselect the layer.
Step 4: Create Multiple Shaped Layers & fill color
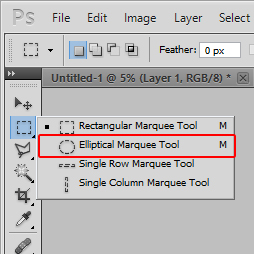
Now first I am making an oval shaped layer, so first select
Elliptical Marquee tool by clicking right key from your mouse on
Rectangular Marquee tool from tool bar and you see an oval shaped tool appears from the box (or you select
Elliptical Marquee tool by pressing
CTR + M twice), just select the oval shaped tool and come onto the layer page and draw oval shape by clicking left key from your mouse and drag down side by pressing
Shift key from the keyboard. after that Create a new layer by clicking onto
Create a new layer from the layer box & select
Paint Bucket Tool from the Tool bar or press
G from your keyboard & choose Red color in
Set foreground color from
tool bar after that fill red color in this oval shaped layer and deselect it by
crop tool as I mentioned in
Step 3. After that set that oval shaped layer top right corner. After that create a Rectangle shaped layer by
Rectangular Marquee tool and by clicking left key from your mouse and drag upper left side to down right side by pressing
Shift key from the keyboard onto layer page to create a Rectangle shape and Create a new layer by clicking onto
Create a new layer from the layer box & select
Paint Bucket Tool from the Tool bar or press
G from your keyboard & choose Red color in
Set foreground color from
tool bar after that fill red color in this rectangle shaped layer and deselect the layer using
Crop tool and set it in end of the layer page. After that create a ribbon shape
(see my Video to make ribbon shape layer) using
Rectangular Marquee tool &
Create a new layer from the layer box & select
Paint Bucket Tool from the Tool bar or press
G from your keyboard & choose Black color in
Set foreground color from
tool bar after that fill red color in this ribbon shaped layer
and set the layer above of Oval shaped layer. After that create a strap shaped layer by following of making as same as rectangular shaped layer filling red color set it below of the oval shaped layer by dragging the strap layer behind oval shaped layer from layer box and move it by press
CTR + T from keyboard and pressing left key from your mouse move toward left side in 45 degree position and after create another 2 strap layers and set it side by side.

Step 5: Add text
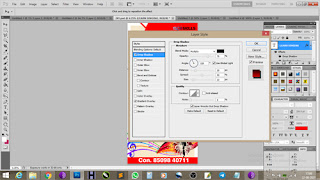
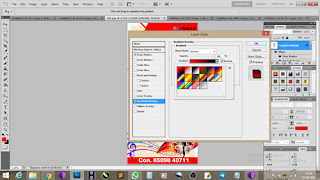
Now select Horizontal Type tool from tool bar or press T from keyboard and then take curser on oval shaped layer and press left key from mouse and start typing. First I wrote LEARN in white color from Set the text color you can see Set the text color in tool option bar below of top bar. press ENTER from keyboard and type GUITAR in the second line and again press ENTER from keyboard and type With SUBHAJIT in the third line. After that adjust the spaces between of upper line & down line sentences from CHARACTER Menu by increasing or decreasing pt. Change the texts style by first selecting all text using CTRL + A from keyboard and go to Text Style on the tool option bar below of top bar here appears a drop down menu I chooses "Vrinda" for LEARN in Bold, "Arial Condensed Bold" for GUITAR and "Tekton Pro" for With SUBHAJIT in Bold. After that increase GUITAR text size than LEARN & With SUBHAJIT text and adjust. After that select Crop tool from the tool bar to deselect the text. Again select Horizontal Type tool from tool bar or press T from keyboard and then take curser below of oval shaped layer and start typing Be Expert In in "Vrinda" text style and select all text by pressing CTRL + A from keyboard and make "Italic" by choosing "Italic" style from CHARACTER Menu. After that press ENTER from keyboard and deselect "Italic" style from CHARACTER Menu and write "-" hyphen sign in red color and after a space write "TABS PLAY" in Dark Red color and aging press ENTER from keyboard and write "-" hyphen sign in red color and after a space write "CHORDS PLAY" in Dark Red color. Following this same step write "- FINGER", "- PICKING", "- HAMMERING", "- PULLING", "- CHUKING". "- BAR CHORDS" and after that select the Move tool (V) from tool bar to deselect the text. Again select Horizontal Type tool from tool bar or press T from keyboard and then take curser below of above text from the right start typing " LEARN" in "Tw Cen MT Condensed Extra Bold" Style & "SINGING" in "Victorian LET" and I uses here a little advance trick to mix Red & Black color in " LEARN SINGING" text. After that change the Set foreground color into Red & Set Background color into Black from the tool bar. From the Layer Menu on the right side of LEARN SINGING layer press twice left key from mouse there appears a window as Layer Style in the left side you can see second option as "Drop shadow" just click on to it and move it's menu in the right side, there you can see some boxes, don't do anything just make changes in "Distance" box for 20, "Spread" box for 50 and "Size" box for 13 that's it. After that in the left bar of layer style you can see "Gradient Overlay" just click on it and go to the right side for Gradient Overlay's menu and there you can see Gradient color drop down box just click on it and there appears color menu, select the first color option for red and black and check the Reverse check box beside of Gradient color drop down box and see the magic. After that Write you Contact Number Below of the page in Rectangle shaped layer. Here we're all set for our text styles now we have to attach some images in order to make the design eye catchy.


Step 6: Add Images
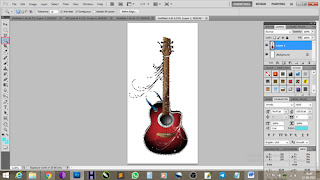
So now I am going to add some images in this design so first go to the chrome browser open Google and type there
Red Electric guitar in png you can use another guitar similarly, then choose a image in high resolution open this image in new tab. After that save this image into your system, after that open image location select the image and drag it inside of Adobe Photoshop and open it in new window. if you couldn't find png format image then you can download jpg format image but keeping in mind the image must be in white background. if you have png image then first open it inside of Adobe Photoshop as I mentioned before and drag the inside of your design and paste there, and if you have Jpg image then first select the
Magic Wand Tool (W) from the tool bar or press
W from keyboard and then take your curser inside of the plain background in order to select the background and press left key from your mouse and select the background. After that take curser in the selected area and press right key from mouse there will appears a menu and in this menu you can see
Select Inverse option just select this option and only the Guitar will be selected without the background. Now drag the Guitar inside of your design. After that adjust that Guitar image keep it left side of the page. After that Download
Rhythm Image &
Microphone Image and open inside of Adobe Photoshop and insert it in the design using same steps, if couldn't get Png image then download Jpg/JPEG image and take the image without background by using same step for Guitar Image. after that adjust & allign images, Texts and every layers as you want and your design is ready.
Step 7: Save your Design in .psd & .jpg Formats
After of completing everything there is only a work remains. That is to save your design as .psd format in order make changes in the design after of saving it & save your design as .jpg format so that you can share or show your design everywhere. So first completing of everything go to the File in left to corner by clicking onto File there you can see Save as in the drop down window or press CTRL + Shift + S from the keyboard, just click onto Save as and a box will appears where it shows you where you want to save your file (Design), just select your place and make the file name as you want here I am giving the name as "Guitar Banner" and the Format will be default as Photoshop (*.PSD;*.PDD) and after that again save design in .jpg by clicking onto File there you can see Save as in the drop down window or press CTRL + Shift + S from the keyboard, just select previous place and make name the file as same as "Guitar Banner" and the Format will be JPEG (*.JPG;*.JPEG;*.JPE). and that's all.
Conclusion
By understanding this tricks & tips or hoe to use tools you can create more creative designs, also you can make this design for yourself or for your friend who is planning to open a Guitar Class and looking for a designer to design a banner, You can make this design using my steps and can earn by selling this design as a Freelancer.
See my tutorial Video to understand it more deeply.
Here I am Selling this Designs only for $5 in .psd format Both designs, one for Printing purpose and Other one for Social Media Advertising purpose if you need you can
Just get the .psd formats and make changes as per your requirements and use it for your own purpose.
if you want me to make changes as per requirement and send it to you, I will be glad to give that service
I will take $10 to create as per your requirements & will send it to you.
Just first you have to complete the payment procedure through Paypal or Payoneer and take a screen shot for your transaction successful record and send it to me using Wahtsapp, Telegram or Gmail, I will send designs to you using your platform.
Enjoy this blog post? Bookmark and Share it on Social Media !
Copyright © SDI Skills. Any multiplication or illicit circulation of the substance in any structure will bring about prompt activity against the individual concerned.
Essential Author and Founder of SDI Skills: Subhajit Dutta
Exposure: Some of the links here are affiliate links. This implies that I might acquire a commission at no extra expense on the off chance that you navigate and make a buy. These commissions assist me with making Valuable Contents like these.


 Reviewed by SDI-Subhajit Dutta Initiatives
on
August 22, 2021
Rating:
Reviewed by SDI-Subhajit Dutta Initiatives
on
August 22, 2021
Rating:

